Monday, February 14, 2022

Jenkins : Changing Port Number


CONTEXT

Most services that get installed on your machine usually tend to use the the 8080 port as their default. Even when you develop a Web App, the default port is mostly 8080 unless you go and configure it to be something else. Jenkins is just one of those apps that use the port 8080 is the default.

So let’s do a quick run on changing the port number to something you would prefer especially if you missed this the first time when you were setting up Jenkins on the server.


LINUX OS

Look for the main Jenkins Profile, file on the server. Mostly in the path : /etc/default/jenkins and use your favourite text editor to change an Environment Variable in that file.


Change Jenkins Port : Linux OS


Change that port number to the new number that you intend to use from now on and then you can save your changes. Remember that you must restart Jenkins.


MAC OS

The way you installed Jenkins on Mac OS plays a huge role on this one. In my case I have installed Jenkins using Homebrew Package manager. I chose to believe that you have installed it the same way. Is that’s the case then look for a Mac OS system process file. This file extension should be ending in ..plist. The path is : /usr/local/Cellar/jenkins-lts/${jenkins-version}/homebrew.mxcl.jenkins-lts.plist .


NB : Pay close attention to this path above and replace ${jenkins-version} with your target version.


Use your favourite text editor to change the port number as show in the image below :


Change Jenkins Port : Mac OS


You will notice that I changed my port number to 8001 for fun. So you go for it as well and then save your changes and remember to restart.


CONCLUSION

It’s always the little things that matter the most in the world. I hope this was helpful and you will find it useful as you are working with tools like Jenkins. Cheers!


Jenkins : Making Jenkins Run Using An Alternative Username


CONTEXT

I was once bothered big time by Jenkins and this thing of running in some sort of a context of its own. Given that it was running under its own user name and had it’s own Maven Repo and many more things I could not run a Maven build on some Libraries for one of the organisations I was consulting at.


PROBLEM

So I would SSH into the Linux server and try to run a Maven build and that would work but, as soon as I try automate the same in Jenkins, then I would have problems. It’s as if Jenkins was an alien on that server. I don’t know if it’s a normal thing for you as well but, it was really frustrating.

But hey, at the same time I was just finding my way around Jenkins. So after some time I learned about a few Jenkins directories. Let’s try sort that out and see if it will help you.


SOLUTION

So one of the several solutions is to try and change the user around Jenkins. Remember that out of the box and the moment Jenkins is running as as user, “jenkins” So you are probably running as “root” or some other username that’s not jenkins.

Assuming that you running as root let’s use the root example.

Mainly you need to assign specific jenkins directories to your username, in this case “root” or whatever user you want to assign this to which is probably safer, security wise. So let’s change the following directories as follows :


  • sudo chown -R root:root /var/lib/jenkins
  • sudo chown -R root:root /var/cache/jenkins
  • sudo chown -R root:root /var/log/jenkins


Once you are done you need to change the username that jenkins is using to your preferred one, in our case we are using “root”. Using a text editor of your choice look for the main Jenkins Profile, file at, /etc/default/jenkins open it and change the 


Jenkins Username Variable


As you can see, I have commented out the original JENKINS_USER=$NAME of which Jenkins was picking up it’s own username, which makes sense. I have also replaced this with our context username, “root”

The last thing you need to do is make sure that you save your changed and then restart your Jenkins. After all this you should be able to automate a few tasks that you could not automate given the whole username issue and Jenkins running inside its own world.


CONCLUSION

I hope this was helpful and you will find it useful as you are working with tools like Jenkins. Don’t be frustrated anymore hey. Just have more fun with these Software Toys! Cheers!


Jenkins : Enabling Unix Alias Recognition


CONTEXT

So you you are on a UNIX system and you want to work with some Aliases in your shell execution but, you hit some issues. This is because it appears that mostly Jenkins has this disabled for some reason. Remember that Jenkins runs in its own sort of context under its own “jenkins” user.

Today we are going to look at some more Unix goodies. So we are going to check out the “Shopt BuiltIn” which is a tool that allows you to make some modifications to the optional behaviour of shell. So you can switch On & Off or Toggle some values of the configurations that have an effect on the Shell behaviour.


PROBLEM TO SOLVE


PROBLEM

Let’s configure a small Jenkins Job that will have an alias and try to use that alias. This is so that we can see the problem in action to make it more clear on the issue we are solving.


Jenkins Job With Alias Problem


So we have a Jenkins Job where we have our own alias named : simple_text_printout of which we also try to use in the line that follows. Now let’s see what happens when we run this Job.


Actual Jenkins Job With Alias Error


As you can see. We have an issue with the Job. Jenkins is telling us that “command not found”. So let’s check a way of trying to solve this using the “Shell Options”“shopt” command.


SOLUTION

We want to basically change the shell behaviour so that it has the aliases toggled on. This is what we meant by changing the shell behaviour. Let’s go through the Shopt Web Manual. You will notice that to get started you need the shopt flag or indicator or command. The second thing we need to do is enable the behaviour. You will notice that you need -s to [ Enable ] and -u to [ Disable ] so this is very important. The last piece to add is to specify the behaviour we want to modify. In this case we want to enable or expand aliases so we will go for the expand_aliases behaviour identifier.

Finally in full we have shopt -s expand_aliases . Add that into your Jenkins job, save your Job and try running it again.


Enabling Aliases Behaviour On Jenkins Job


Results After Changing Job


 Jenkins is now happy. You can explore more on this shopt tool.


CONCLUSION

I hope this was helpful and you will find it useful as you are working with tools like Jenkins or even in general, may be there are some Unix distributions that don’t have this out of the box and you would like to have this behaviour.


Saturday, January 15, 2022

Jenkins : Making Job Console Logs Less Verbose


CONTEXT

Jenkins prints out commands as they happen, mostly on Unix and this can be annoying if you don’t want a lot of Jenkins console logs, especially if they are just more like duplicates of your commands. This is an automatic out of the box behaviour. There’s a way we can tell Jenkins to instruct the machine to turn off these verbose duplicate commands.


SETTING UP THE INSTRUCTION


COMMAND CONTEXT

To achieve this, we can look into the Unix Bash’s Set -x and Set +x commands. So setting the “x” mainly instructs Bash to perform extra duplicate print out of commands as they are being run or executed. See this is another useful way of debugging your Bash scripts if you want to know the statements that are being executed and also the order they are being executed.

To toggle this on and off one can do any of the following :

  • On the command line via the Set -x or Set +x command to enable or disable the printouts.
  • Via the “Shabang” line in your script by appending the -x or +x .

Now the confusing thing is that the commands work the opposite way, i.e. the -x is to enable while the +x is to disable the printouts. So this is just a note right there. You can try these commands in your Bash terminal and scripts, I am going to just jump into Jenkins since that’s the point of this article.


WRITING THE JENKINS SCRIPT

In my previous Jenkins article Jenkins : Importing Your Custom Environment Variables I had a Jenkins job that ran and we can use that to showcase the Set -x and +x commands. Looking at the image :


Jenkins Annoying Duplicate Echos


You will see the highlighted line in a purple block. This is the annoying line I would want to get rid of. At the moment my Job Script is as follows : 


Script Before Disabling The Command Echos


This is before we use the set command to disable the echos, now let’s change the script to disable the echos.

As mentioned this can be done in two way, we can use the “Shabang” line at once with some like : #!/bin/bash +x


Script Updates To Disable The Command Echos Using Shabang


Or you can just use the Set +x command :


Script Updates To Disable The Command Echos Using Set Command
 

Either way you will get the same effect. The only difference is that using the shabang line makes sure the echos are off before running any line in you script while the set command will have the echos until the set command is executed. That’s all.


TESTING IT OUT

Run your Job and you will spot that the the annoying “echo” line we had before is now gone. You may refer to my results below : 


Script After Disabling The Command Echos


CONCLUSION

And there you have it, you now see one of the many possible ways of disabling the duplicate command echos as they are being executed. I hope this is yet another helpful tip to disabling the command echos as they happen. Let me know what you think, Cheers!


Jenkins : Importing Your Custom Environment Variables


CONTEXT

You are working on Jenkins and you want setup and work with some of your own custom Environment Variables and you discover that Jenkins cannot pickup your machine environment variables. Today we are going to look at how you can load your own custom variables that you want to use inside your Jenkins Scope.


GETTING STARTED

Start by creating a new Job that just prints out the value from any of your machine environment variables, I have JBOSS_HOME. You will notice that the value from your machine environment variable did not print. So it’s not you it’s just the behaviour of Jenkins. 


echo 'The System ENV variable in my bash profile is : ${JBOSS_HOME}"


Simple Jenkins Print Out Shot


I am guessing that’s why there’s a reason we have a special plugin we can use.


INSTALLING THE PLUGIN

Head over to the plugins section of Jenkins Manage Jenkins > Plugin Manager and search for the plugin named "Environment Intjector"


Environment Injector Plugin Installation


Restart Jenkins when the installation is complete and then let’s configure the variables next. 


CONFIGURING YOUR CUSTOM VARIABLES

Now that the plugin is installed we can start configuring it. In our current case we want to add a random simple Environment Variable and then we will print it out. To do start by heading to the configurations section in Jenkins as follows : Manage Jenkins > Configure System


Manage System Configurations


Once you are on the Configuration page then, look for the heading or section, “Global properties”. You will notice a check box labelled, “Prepare jobs environment”. Check that box where a text box will show at the bottom labelled, “Properties File Path”.


Things to note well here are :

  • One more thing to note very well is that the text box label states clearly that it expects a .properties file path. This means that you must create a .properties file which will be the one that contains your variables.
  • The path you specify must be an absolute path, you cannot use the your OS short cuts like ~/ and ${HOME}/ . so for example I have a path named tools/jenkins/jenkins-environment.properties in my home directory


So modify your .properties file and add a key = value par line with a key and value of your choice, I have my first name in the file as follows : ENV_MY_FIRST_NAME = Thabo which I will be printing in Jenkins shortly.

The next thing is to configure the text box path to where your file is : /Path/to/your/environment/file.properties


Jenkins Environment Variables File Configuration


Click the “Apply” and then the “Save” buttons. The last thing to do now it to restart Jenkins so that it becomes aware of the new Environment Variables.


CREATING / UPDATING THE JOB TO USE THE CUSTOM VARIABLE

So now we have configured all we wanted to configure. Let’s look into creating or updating a Job that will perform a simple variable printout, that’s all. So remember that my key = value pair is : ENV_MY_FIRST_NAME = Thabo so this means that I can now reference the key of the value I want to use. Check out my Job Shell Script below :


echo 'The System ENV variable in my bash profile is : ${ENV_MY_FIRST_NAME}"


Jenkins Shell Referencing Custom Environment Variable


Click the “Apply” and then the “Save” buttons.


TESTING IT OUT

The moment we have been waiting for, you may now run your Job and checkout the console logs. Checkout the image below for my results :


Jenkins Environment Variable Printing Results


CONCLUSION

This is how you can configure Jenkins to use your own custom environment variables. I hope this is useful to your Jenkins usage. Let me know what you think. Cheers!


Monday, November 15, 2021

Kotlin - Getting Started With Scripting


CONTEXT


So Kotlin is picking up nicely, and has been doing well. Mainly starting as some sort of alternative to Java by targeting the JVM making it interoperable with Java. So Java developers can move to Kotlin slowly, they don't have to migrate to Kotlin right away. The other great thing about Kotlin is the fact that you can compile it to Javascript making it target Javascript nicely and finally Kotlin can run natively. So this makes Kotlin a very powerful language.


It's really great, I mean Google has made it an official Android Development language, so this means we have an alternative to Java when working with Android Apps. Further more Gradle has picked up on Kotlin as an alternative to Groovy. We now also have KMM ( Kotlin Multiplatform Mobile ) so this makes it fit into the Flutter and Ionic where you can develop an App for both iOS and Android using Kotlin. So you write once and then compile for both platforms.


So I see Kotlin as the new Groovy language. So another thing about Kotlin is that you can use it as a Scripting Language. So yes, you can replace your Bash & Python scripts especially for more complex operations you want to run. Bash is can be hard to read and maintain. Python is great plus it's an interpreted language meaning you don't need to compile it like Kotlin Scripts. Just know that there's an alternative to Python / Groovy / Bash / Typescript and many other scripting languages.


So out of the box if you have set up Kotlin, you can already run the .kts files using the command kotlinc -script YourScript.kts <args>. The pain point here is that Kotlin will always have to compile the script and packaging into a .jar before running the script you intended to run.


It would be nice to have some small framework or enhancements to the existing Kotlin Scripting Engine that can help us cache these compiled scripts and make it more portable so that we don't always to go through that step mentioned above. That's why I would like to introduce you to KScript, enhancements made to the existing Kotlin Script Engine written by Holger Brandl.
  • Caching of the compiled jar files so that when you run the same script without changing the script
  • Dependencies uses the power of maven to pull some custom and third party dependencies.
  • Sourcing / Inclusion of other Kotlin Scripts.

So obviously these features are not news for people who have worked with other scripting languages, but it's good to note some of the features included.


GETTING STARTED

In order to get started you will need the following tools up and running on your machine :

  • Kotlin because it's the core language of you scripting in this case.
  • Maven because one of the nice features with Kotlin is that you can pull in dependencies.
  • Kscript which is the underlying Kotlin scripting enhancements framework.

I don't know about you but, I set up my environment using SDK Man! It's simple like that you can check it out on the net or look at my article, Managing Multiple Sotware Development Kits Using SDK Man! article


INSTALLING KOTLIN

At the time I am writing this article, the latest version is 1.5.31 so here goes :

sdk install kotlin 1.5.31


INSTALLING MAVEN

If you don't already have maven then : 


sdk install maven 3.8.2


INSTALLING KSCRIPT / KOTLIN SCRIPT

If you don't already have maven then : 


sdk install kscript 3.1.0


TEST DRIVE


QUICK SCRIPT

Open up your favourite IDE or text editor and let's write some Kotlin to test drive it.


#!/usr/bin/env kscript
/** * @author: Thabo Lebogang Matjuda * @since: 2021-05-23 * @email: <a href="mailto:tl.matjuda@gmail.com">Personal GMail</a> */ // Variables section here. val scriptUser = args[0] val functionMessage = getMessageText( scriptUser) // Print out some results println( functionMessage) /** * Takes a String value as an argument and returns text. * This returned text is a string interpolated message with your argument. */ fun getMessageText( callerName: String): String { return "Hello there $callerName" }


And there you have it. The first line is standard with some scripting languages like Bash, we just pointing out the which engine this script should use in this case it's the kscript engine Kscript expects a standard args collection just like with Java's public static void man (String[] args) {} method. So we are just pulling one parameter at index zero which Just like Java. I included a function getMessageText in here just to showcase that we can do that in the script file. As you can see if we also have string interpolation where we don't have to concatenate the parameter $callerName. The function takes in a String parameter and also returns a string, there's some TypeScript looking syntax there as well. Really nothing fancy here. 


TESTING THE SCRIPT

Go ahead on your terminal and run it like you would run a PowerShell or Bash script :


./ITTestDrive.kts Thabo


I saved my script as ITTestDrive.kts so you can save yours as anything you want. Nothing hectic there. Also notice that I am running mine with my name as the parameter. Another way or running the script is : 


kscript /where/ever/your/script/IsPlaced.kts
# For Example with our case kscript ITTestDrive.kts Thabo


Kscript Execution Example


So execute your script and you will notice that the first run is taking a bit long and that's because your script is being compiled and packaged into an executable .jar file. If you run the same script again without changing the code then it will be faster because now your script has been compiled before and Kscript can see that there are no new changes, meaning it does not need to re-compile your script. So now you wonder where this compiled .jar is saved, well in that case check a folder ${HOME}/.kscript inside your home directory, that being. You will then notice a jar file in there. That's your new script! If you wish to clean up on these cached file from time to time you can use the command :


# Clearing the Kscript Cache
kscript --clear-cache


You can see now how all this works, unlike Python and Bash, you can see there's a drawback of compilation time, if this compilation does not bother you then go for the Kscript and have fun. 


Kscript Cache


CONCLUSION

That's it! Well done you have written your first Kotlin Script and yea, may be we can look into more Kotlin Goodies in the future and have some more fun. Let me know what you think, Cheers!


Spring Boot App As A Unix Service ( Systemd )


CONTEXT

When thinking of the modern way of delivering software then tools like Docker & Kubernetes come into mind. If you are in the open source world working with languages like Java where you can package your entire web application into a .jar file and then that can later be “Dockerized“ aka “Containerized“.


This is all good and there are hordes of documentation and articles that support that this is great, but what happens when you are in the space where docker is not “in yet“? You have this .jar application but cannot really containerize it because the infrastructure is not there yet.


In this article we will be learning about an alternative, which is to install your “Containerizatble“ application as a Unix Service using Systemd.


ASSUMPTIONS

  • You have a packaged app, in .jar format.
  • This packaged app is executable.
  • Your target Linux server has java installed.
  • Your target Linux server has systemd installed and enabled. ( this is mostly a standard now with most Linux Distros )


GETTING DOWN TO IT

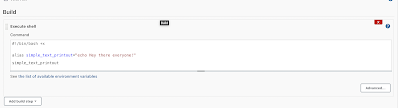
So then let’s go for it, the main thing here is the Unit & Service definition which will be configured inside a .service file. This .service file should be placed inside the systemd default folder : /etc/systemd/system. Let’s go ahead and create a service file, you can can name it whatever you want, I prefer to give it the same name as my actual app or something close but, to show that you don’t need to keep it the same, I will have the names different. 


Let’s have a look at some of the elements in my case. My app file name is tpserve-1.0.0.jar and I created a .service file named toob-serve.service. These files are in the path /root/toob. Let’s have a look the following image. 


My Linux Service Files


SERVICE FILE

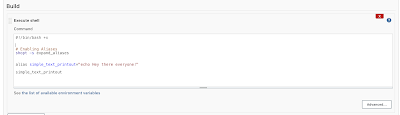
You can either create the .service file directly inside the /etc/systemd/system folder or create it somewhere else then copy it over when you are done. I chose to create is somewhere else then copy it later to the /etc/systemd/system directory. So let’s look at my simple .service file and evaluate what's happening. In my case I have : 


Systemd Service Configuration


For copying purposes : 


[Unit]
Description=TOOB Services
After=syslog.target

[Service]
User=root
ExecStart=/root/toob/tpserve-1.0.0.jar
SuccessExitStatus=143

Restart=always
RestartSec=5

[Install]
WantedBy=multi-user.target


[UNIT] 

Description is used to describe the unit that will be executing this service. In my case you can see there I just have “TOOB Services” then we can later see easily in the logs that this unit will be referred to as “TOOB Services” this makes it easy to know which service you are looking at.


After is mainly to start that it must start of the the syslog.target which is part of the core OS processes that kick in when the machine boots up. So it’s just a safer way of making sure we boot up after the more important OS processes.


[SERVICE] 

User tells us more about the user we want to use when running this service. Generally it’s good and more secure to create a specific app user and assign that user to run the app. In my case I am just using root to showcase systemd services in Linux.


ExecStart runs the target service that we want to bootstrap and manage using systemd. In my case I want to execute my .jar app. So you can use this ExecStart to run any app you want to run. It even be a bash script if you like. Anything that’s executable that is. Another important thing to note is that I am using absolute paths because systemd only works with absolute paths.


SuccessExitStatus takes a list of exit status definitions that, when returned by the main service process, will be considered successful termination, for example : 


 SuccessExitStatus=1 2 8 SIGKILL


… ensures that exit codes 1, 2, 8 and the termination signal SIGKILL are considered clean service terminations. Also not really required for a basic Service Config! 


Restart yes we want our service to restart if anything has happened. So this is a nice way of restarting without manual interaction. So it’s cool if if the database service went down for like 3 seconds. 


RestartSec is all about how long we should before we automatically restart. That’s all there is to it. 


[INSTALL] 

WantedBy tells systemd that this service should be started as part of normal system start-up, whether or not a local GUI is active. There’s really no dependency on the OS UI loading. 


INSTALLING SERVICE 

We now have our service configuration done in the .service file and are ready to install it and manage it using systemd. To install it let’s copy our .service to /etc/systemd/system, in my case I am copying my toob-serve.service file : 


Service Installation


SERVICE RELOAD

We have installed this service but systemd does not know about because it does not automatically reload new services, unless may be you restart the OS. So we have to reload / refresh the systemd daemon. To reload or refresh it run : 


 sudo systemctl daemon-reload


Let’s also enable the service one shot : 

 sudo systemctl toob-serve


SERVICE STATUS CHECK

Now that we have installed the service and reloaded, systemd knows about it. We can verify that the service has been installed by running the status check :


 sudo systemctl toob-serve


Systemd Service Status Check


Notice that I didn’t have to specify the .service part this is because systemd now knows about it and can tell that we are referring to that file. You will also notice that we can refer to our service easily in the logs by looking at the description that we defined, “TOOB Services“. So at this stage we know that :

  • Our service is installed

  • Our service is enabled

  • Our service is currently not running, so it’s inactive (dead)

Happiness so far and we can continue with the next steps. 


SERVICE START

Let’s give our system a kick start and check it out : 

 sudo systemctl start toob-serve


SERVICE LOGS CHECK

If you have configured your logs directory inside your app then you can also verify by checking the file wherever you have configured it. Otherwise another case is that you have not configured your app to create a separate log file so then if we haven't configured anything special, our Spring Boot application should write its logs to stdout. Now also keep in mind that our application is now running as a daemon, which means that we aren't able to view the stdout of the application anymore. This is where a utility like JourneyCtl comes in. 


We can check the logs using history check : 

 journalctl -u toob-serve

The command from above will drop us into a view with which we'll be able to view all the logs of the application since it has been deployed, with various options for filtering and more.


Or we can tail live logs, similar to tail -f this can be achieved with : 

We can check the logs using history check : 

 journalctl -u toob-serve -f

Now this command will help us with with info about the last log lines written by our application, it will also monitor the new log lines to come.


JournalCtl Logs


So there you have it. The main thing is now complete. You know how to install your Spring Boot app as a Linux service using systemd. We are not done as yet, let’s look at the last bits and pieces, like how to stop your service or even two birds with one stone where you can run a restart which will stop and start once.


SERVICE STOP

To stop your service you can run : 

 sudo systemctl stop toob-serve


Systemd Service Stop


As simple as that, your service will be stopped and you can spot it by the defined description as shown in the image above.


SERVICE RESTART

Yes, you guessed it, to restart your service you just need to : 

 sudo systemctl restart toob-serve


SERVICE UNINSTALL

So you now want to uninstall your service, at this point you need to use a couple of commands. I prefer doing it in a certain order to make sure that things are done properly. My flow of things would be to first stop the service with the systemd stop command. Then I would disable it, which is the opposite of enabling it like we did in the article earlier, something like : 


 sudo systemctl disable toob-serve


I would then remove the .services file and then perform a services reload like we did earlier and you should have a hint on the console that the service has been removed : 


Systemd Removed Service Log


CONCLUSION

That’s all I have for you on setting up your Spring Boot app as a linux service using systemd. This is not the only one I have learned that some Linux Distros like Ubuntu come with Upstart. And that that systemd is more of a successor to System V. And there are a few more, so we were just learning about systemd. If you are curious about more systemdservice configuration options you can check out this exhaustive list of them here. I hope this helps you out. 


Let me know what you think, let’s also discuss more to learn more. Cheers!